Tag Archives: Copic Sketch markers

SSS Use Some Green

Standard

Good morning friends,

I have a double page spread in my Dylusions large journal book to share with you all today.

I have used “Some Green” and would like to enter this into the Simon Says Stamp Wednesday Challenge blog: “Use Some Green.”

Here is the left side of the book:

march-112020-left-side

The background started off as wipe offs from my brayer when using my Gel Press.  Later on I added Dylusions paint and my round Gel Press and various Dylusions stencils.

I opened up my package Grungeboard by Tim Holtz. The paper that come with it was fascinating to me, and I immediately thought to myself that I need to put this in my Journal book. So that is what I did last night and I pulled out my container filled with Tim Holtz pre-cut outs of  “Paper Dolls,” and the “Botanical Layers” cut-outs. I did the right side of my book first, however I am showing the left side first.

The banner is a left over from making the Dylusions Tag blogged HERE. The GREEN leaves on the right side of this page is leftovers from this Tag blogged HERE. The tiny house at the bottom right is from Dylusions stamp set “This Old House,” colored with Copic markers. The flower on top of the woman’s head is from a Dylusions clear stamp.

Now for the Right side of the book:

march-112020-right-side

There is the paper insert from my Grungeboard package!! Don’t you just love it!! It has the definition and then that beautiful swirl on the left! Yikes! It’s just yummy!

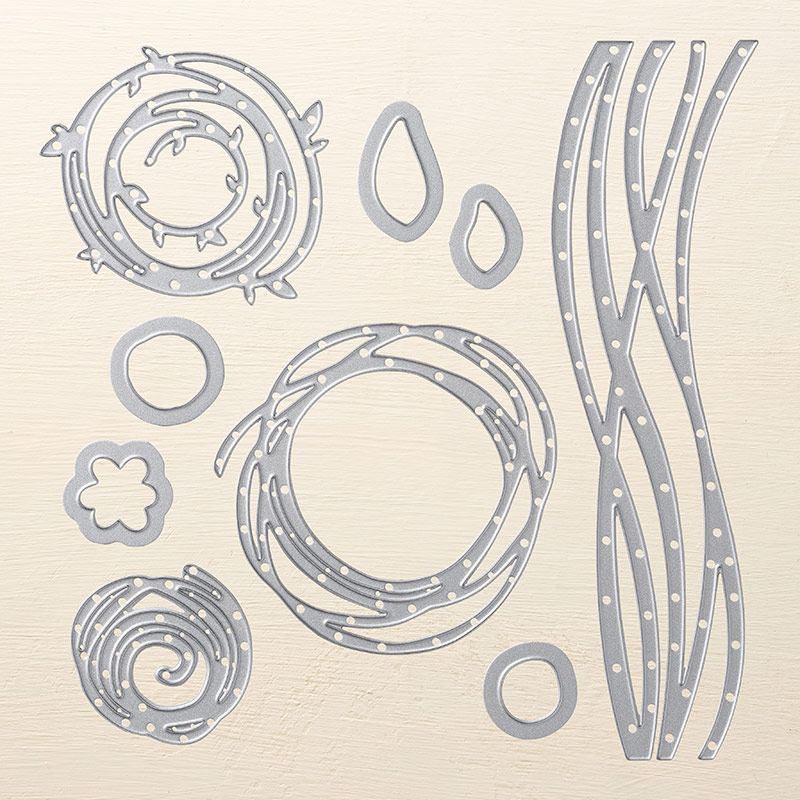
I used 6 different Tim Holtz cut-outs on here and the thick die by TH called “Honeycomb.” The BG was brayer wipe-offs, then random stencils added using Dylusions paints.

march-112020

Thank you for stopping by my blog today and thank you for leaving me comments.

Stay crafty! And come share with me your art style on my Facebook group!

Peace,

KristyLee

Dylusions Birthday Tag

Standard

Good morning,

I would like to share with you a Tag that I made for my friend’s birthday. I thought a tag would be a fun change to a birthday card.

I would like to enter my tag in to the Simon Says Stamp Wednesday Challenge “Something Feminine.”

gina-k-birthday-march-2020

To create this tag I started off with using Dylusions paints in the colors: London Blue, Campso Teal, and Vibrant Turquoise. I sponged these 3 colors, then I used a Large Dylusions stencil with the colors: Lemon Zest, and Peony Blush. I used the numbers from the stencil and put it in the center of the tag, which I ended up covering. I should not have done that but oh well now.

I stamped the Cat head from The Fancy Four and the Dress and Bow from Couture Collection, onto X-Press It paper and colored it with Copic Sketch markers.

For the Butterfly wings from Flight of Fancy clear, I had a piece of Brea Reese yupo paper that I did using Brea Rsese Alcohol Inks. I was curious about the colors and her paper. In my personal opinion… I do not like the inks nor do I like that paper, it does not work like the TH Alcohol inks. I will not purchase again. However, I like this piece I did and used for her wings. Here is a photo of that paper: brea-reese

I stamped the banner from Bags of Bunting, onto a piece of TH Glossy CS that I used TH Alcohol Inks on. th-a-ink

The mushrooms at the bottom are from Toadstool Town, so is that cute bee at the top. I stamped the shrooms onto a piece of TH Glossy CS that I used TH Alcohol Inks on, then detail cut each one out. Here is what that piece of paper looked like: th-ink  I stamped the toadstool’s using some green Dylusions ink onto the tag, then added the cut out ones on top with foam squares.  The sentiment is from an old FSJ stamp set.

Here are some photos of my supplies used:

supplies2020 supplies-stamps-2020

Thank you for your visit and your comments. I personally had a fun time creating this crazy tag. I hope my friend likes it.

Stay crafty my friends.

Peace,

KristyLee

Valentine’s Day cards 2020

Standard

Good afternoon crafty friends,

I would like to share with you all some Valentine’s Day card I made using the “Sizzix Framelits Dies by Stephanie Barnard – 118048” and RG Avenue stamps.

love-you2020

For this card I used the RG Avenue stamp set called “Sweet Love.”

I used Copic Sketch markers to color my image. Then with a piece of old towel I sprayed some 91% alcohol onto it and mushed it to onto my bear. Going for the molted, fluffy look.

My cardstock and printed paper is from a friend’s stash. She has passed away, and her husband is selling off her craft supplies to donate to Hospice in NC.

Added some Nuvo dots. The top left corner cut-out if from Crafter’s Companion. The card has been cut using the “Sizzix Framelits Dies” it comes with extra heart dies, and that Love you cut out, and that swirl under the bear’s foot. It does not come with a separate cut out for the panels of patterned paper I added to the side. I used the die as a template and traced onto the paper where I would cut it to create that shape and size for the extra panels of printed paper. I used Spelbinders heart dies behind the bear.

love-you-1-15-2020

Using the same die and same RG Ave stamp set Sweet Love, and paper from my friend Pat Jayne. I also colored this bear w/ Copics and used terry cloth to create a fluffy texture on the bear. I added gold wire to the bouquet of flowers. Rhinestone stickers from Bo Bunny on the center heart, on the left. Nuvo drops. I used Spelbinders heart dies behind the bear.

little-e-2020

Using that same side step card die. The robot is stamped using Memento black ink, colored w/ Copic Sketch markers. RG Ave stamp called “Beep Bots.” Nuvo dots.

The circle star cut out if from Close to my Heart,” called “Shaker Window & Confetti.” #Z4309. I cut it out using white card stock, then I Silver embossed it. I also silver embossed the 3 hearts on the right side. My idea for the circle there was to represent the moon.

For the background I Clear embossed the RG AVE stamp “CyberSpace” stamp. Then I used the RG AVE ink Sour Crush to sponge all over it.

Anastella-2020

I did the same thing here, Silver embossing powder on white for the moon. Clear embossing powder with the “CyberSpace” stamp, then I sponged on pinks, yellows, and oranges. Colored the Robot from RG Ave stamp “Beep Bots,” with Copics. I used Stickles.


Thank you for stopping by, I hope you enjoyed my Valentine’s Day cards. I love comments.

Stay crafty my friends,

KristyLee

Christmas with RG Avenue Stamps

Standard

Good morning, I have some Christmas cards to share with you today.

These cards are made using RG AVE stamps.

christmas-2019-NT

For this card I used: Sour Guava card stock.

The stamps are digital downloads called: “Cozy Christmas” which is free w/ purchase, for the deer and sentiment. Deer colored w/ Copic Sketch markers. The back panel is “Lumber Jack Plaid.” I colored it with “Tangy Gum,” in PSE10.


non-tradish-colors-2019

This card I made for a challenge on the FB group RG Avenue Community. I was to use non-traditional Christmas colors. So I used neon cardstock, and colored using neon Copic markers. These images are also from the “Cozy Christmas” set. The black cardstock has been embossed using a Stampin’ UP! embossing folder w/ snowflakes.

winter-on-cd-8-19

Here is an altered CD ornament. I used the set called “Winter Rose.”

Christmas-ch-9-26-2019

For this card I sprayed the background using “Minc Reactive Mist,” then used my MINC. and green reactive foil. The sentiment is from the set called “Winter Wonderland.” I also foiled the sentiment in green reactive foil.

2019-bday-girl

This card here is kind of a joke! The sentiment says all I want is you, however she is holding LOTS of packages! The girl is from the set called “Birthday Girl.” I colored it in PSE10 with traditional Christmas colors to make it look Christmasy. I splattered it using “Dazzling Pat.”  Embossing folder from Cuttle Bug.

flalalal-llama-19

I won this llama stamp set a few month’s ago and I have been dying to turn it into a Christmas card! So I did! I used the set called “Llamazing.” The gift is from the “Cozy Christmas” set. I typed and printed the FA-LA-LA-LA. Paper from American Crafts. Colored w/ Copics.

I would like to enter this last card into the following challenges:

Artsy Stamper: Challenge #5 – Winter Holidays 

Ellibelle’s Crafty Wednesday – December Challenge

Lil Patch of Crafty Friends Challenge Blog #C119

Thank you for stopping by my blog today, and thank you for leaving me a comment.

Merry Christmas, Happy Holidays, and Happy New Year!

Peace,

KristyLee


Simon Says: Art Journaling

Standard

Good evening crafty friends,

I  creates a 2 page spread in my Dylusions Large Art Journal Book. I am entering this into the Simon Says Challenge blog for the Monday Challenge called “Simon Says: Art Journaling.”

Dearly-Departed-2019

I used the following Dylusions stamp sets:

“Bits if This” Ranger Dylusions BITS OF THIS Portrait Skull Cling Bees Collage Rubber Stamps  
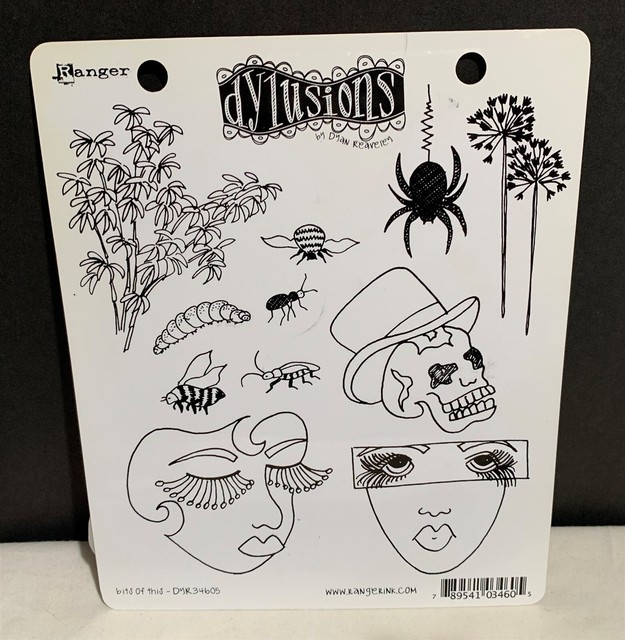
I used the skull head w/ the hat. I stamped one regularly, and the other head I stamped on a reversing block so “she” would be face the opposite way. The heads where colored with Copic Sketch markers. I also used the bugs on here and stamped them all over.

“Passage of Time” Image result for dylusions stamp time clockwas used for “Her” dress, and her legs are from the set called “Legs.”  I colored this dress with Dylusions Pain Pens.

“Winston & LuLu” Image result for dylusions stamp time clock 
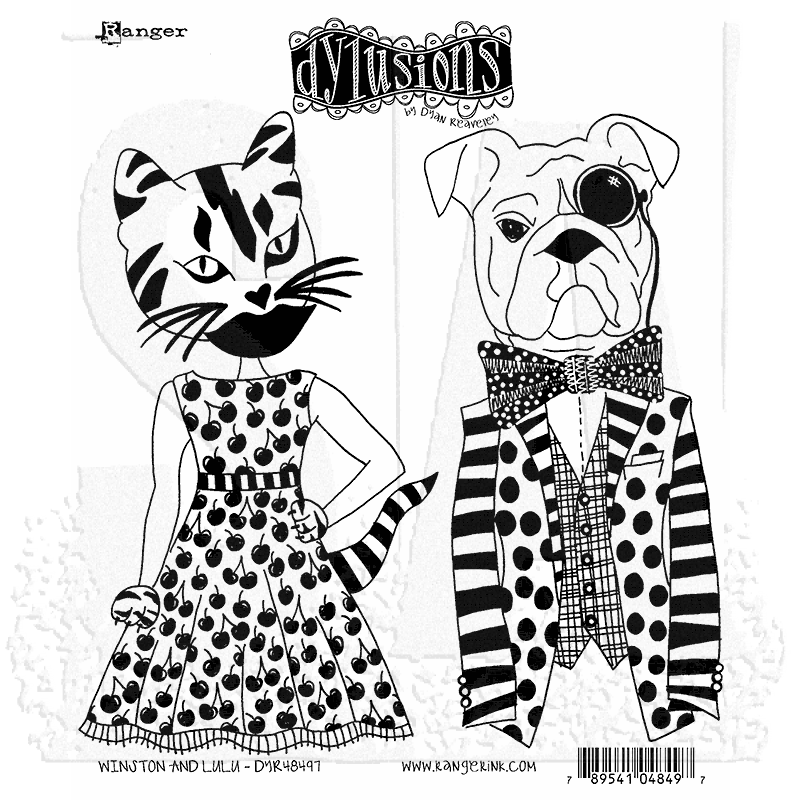
I used the Winston’s coat & bow tie for “Him,” and a pair of “Legs.” Colored using Dylusions Pain Pens.

“Legs”These were colored using Dylusions Pain Pens.

“Doodle Parts”The swirly thing was stamped using green ink pad onto sticker paper, detailed cut and pasted. I then added some Dylusions “Cut Grass” spray ink watered down and painted over it, so it’s not stark white.

“Mischievous Malcom”Ranger Dyan Reaveley\'s Dylusions Cling Stamp Collections, 8.5 by 7-Inch, Mischievous Malcom This set was used on the right side of the journal book. Malcom’s head was colored with Prismacolor pencils, his outfit  was colored  using Dylusions Pain Pens. The Monster was colored with Copic markers. I added googly eys to it. The tree was painted with watered down Dylusions ink spray in “Melted Chocolate.”

I added stickers from stash that read: Dearly (I wrote Departed) Forbidden, Lovers, & Forever. I took the picture of this AJ page outside in the bright sun, so the foil stickers do not show up in the photo. The “Wool of  Bat” and “Nevermore” are some leftover G-45 paper.

The left side started out as a Gel Press print, just using wavy lines. The right side was also a pull from the Gel Press. I used the Dylusions Large stencil “Keyhole” Image result for large keyhole stencil dylusionsusing Dylusions paints Lemon Zest & Pomegranate Seed.  I didn’t like it too much so I did a wipe off on it. Then I started adding things on top.

“Graphic Background” and “Boarding on the Edge” Bordering on the Edge - Dylusions Rubber Stamp Set by Dyan Reaveley, 6 pieces: borders, swirls, letters, alphabet (DYR34599) - Only One Life Creations these were stamped randomly on top of both sides.

I added googly eyes for fun.


Thank you for stopping by today, hope you like my crazy pages. Thank you for leaving me comments.

Peace,

KristyLee

Fat Page swap for RG AVE Community FB group

Standard

Hello crafty people, today I am going to share with you some Fat Pages. These Fat pages were created for a swap that I host on Facebook called RG AVE Community.  

I host a monthly swap, each month we swap different types of paper craft projects.  This swap is our 10th swap, and the theme is “Halloween” and to make 2 Fat Pages. 

What is a Fat Page?
Fat Pages are 4 inches by 4 inches created w/ your art work. You can make mini journals/albums with them, use them as inserts into journals etc… It’s in a way like an ATC meaning it’s a little bit smaller than a card. It is just one sided like an ATC. Also like an ATC it has size requirements! A Fat Page is 4″X4″.

I am going to share each person’s Fat Page and their name, links to the stamp sets.The first 2 photos are the 2 that I made.

But here is the thing with RG Avenue stamps…. when you get the non toxic clear stamp you ALSO get the same set in a digital file in the formats of PNG, JPEG, SVG!! I like that because I can bring the SVG files into my cricut and use them as cut files as well as printing onto paper and coloring them.

  1. I used “Halloween Treat.”  

72634757_10156148639757723_4645530085841960960_o

To make this Fat Page, I mushed some Tim Holtz Distress Oxide Inks on my WRMK glass mat and layered up RG AVE cardstock, until I liked how it looked. I then stenciled the starts and moon. I glued a piece of cardboard from a cereal box to the back for added security. I wanted it to be sturdy in case the receiver wanted to set it out on display as a Halloween decoration. Because that is what I am doing w/ the 2 that I received from this swap.   I added some raffia for the stray/ hay look. The small bat, cat, witch, and tombstone are sequins. Added a silver spider charm to the tombstone.  I colored my stamps with Copic Sketch markers.

2. “Halloween Treat.”

72731942_10156148639857723_6884506596060168192_o

I used the same stamp as the first one. “Halloween Treat.”  The BG was created using the new HOCUS POCUS stencil that came with the Limited ED stamp set by Tim Holtz and Distress Oxide Inks. The trees were cut with black CS, the die is by Memory Box, called “Grand Forest Archway Die.” I colored the images with Copic Sketch.

This Fat Page here is from Nancy Heidinger:

73132085_10156148639907723_809592444713697280_o

Nancy also used the stamp set “Halloween Treats.” She used a small piece of washi tape w/ a spider for her spell book. I really do love how this looks like a table and the book is open.


Here is Debbie Daniels Fat Page:

74897644_10156148639797723_5968071114667065344_o

Also using the stamp set “Halloween Treats.” She added some slashing’s of white to represent light from the witches wand.


Here is Rose Curtis’ Fat Page:

74342664_10156148639787723_8277936004271177728_o

Rose has used the stamp set “Frightfully Cute,” for the witch’s hat and flowers. The mug is from the set called “Seasonal Mug.”  

Here is Nidhi Jain’s Fat Page:

72646439_10156148640057723_8728004428923142144_o

Nidhi, has used the stamp set “Seasonal Mug.” She added some silly cute eyes to her mug!


Here is Claudia’s Melgar’s Fat Page:

72565417_10156148639927723_8484863581517512704_o

Claudia used the stamp set “Halloween Treat.”  For her background layer she used the stamp set “Hand Written.”

I think these swappers did a great job. What do you think?

Our next swap is Artist Trading Coins. If you would like to join in and swap with us go to the RG Avenue Community FB group and join. I post the swaps on the 15th of each month.

Thank you for stopping by and thank you for your comments.

Peace,

KristyLee

Harvest Greetings

Standard

Hello Crafters,

Thanks for stopping by. I have a Fall card to share with you. I followed a sketch from “Sketch~N~Scrap” blog challenge.

Here is the sketch:

My card:

Harvest-Greetings-2019


For my center image;  I used a Free Digital Download offered in this month’s newsletter by RG Avenue.

It was printed out w/ my laser printer onto X-Press It blending card stock, and colored with Copic Sketch Markers.

For the foliage I used a Martha Stewart punch with different pieces of CS from by scrap bin. Also from the scrap bin I used some green with my Stampin’ Up Thinlits die set called “Swirly Scribbles.”

For the background I used Tim Holtz Oxide Inks using watercolor paper by “Strathmore.” I splattered the top of my card with Gold and Sparkle Silk, from FSJ.

Image result for xpress it card stockFun Stampers Journey - Paint - Gold SilkFun Stampers Journey - Paint - Sparkle SilkNo photo description available.  

Image result for stampin up thinlits dies swirly scribbles   img


If you would like to check out the RG Ave Community’s Facebook Page click ME

Come by and say hi and show me what crafty projects you are into at my Facebook page click ME.

I am entering my card on to the challenge:

World Card Making Day 2019 ~ Sketch #1


Thank you for stopping by.

Peace,

KristyLee

3rd Grade in Japan

Standard

Good afternoon crafters,

This morning I created an 8 x 8 scrapbook page using my granddaughters 3rd grade photo. My daughter and the family have been stationed in Yokosuka, Japan. They arrived on a Thursday and on Monday it was the first day of school.  Leia, is super excited that there is no school uniforms to wear this year. In VA Beach they require the children to wear uniforms to public school. Makes the question “What are you going to wear today?” So much easier w/ uniforms.

Leias-3rd-grade

For my 8X8 scrapbook page I started off with a piece of black card stock. I had some printed scrapbook paper in my head and could not find it. I don’t know if I dreamed it up or if I saw it one a card posted somewhere? I looked all through my printed papers and I could not find anything I liked this morning.

I try so very hard to use printed scrapbooking paper, because I so have so much of it.  I decided I would just use my letter stencil,  from “Stencil Girl,” and a white ink pad.

I used a digital image from The Paper Shelter called “Coffee Break.”  I colored this image with Copic Sketch markers.

To me this digi looks like a young girl doing some school work, or studying on her laptop. Even though my grand daughter does not drink coffee, she does love some hot chocolate.

Found a Japanese sticker in my stash that says “to attain one’s goals.” How apropos! Had to add a piece of ruler ribbon that I have had for a while. The blingy flowers were in my bling stash. They reminded me a little of cherry blossoms, just the shape.

I am entering my scrapbook page in the following challenges.

“The Paper Shelter’s” blog challenge “Challenge #395 – Back to School

The C.R.A.F.T challenge blog:- #525 Back to School

PINspirational Challenges #246 Back to School 

Crafty Creations Challenge:#397 – Anything Goes

Thank you for your visit.

Peace,

KirstyLee

BOOM! Crushed It!

Standard

Good afternoon,

I made a card for my boy friend’s grandson. He was awarded an award at his Elementary school, called Presidential Award. And of course the granddad is proud. And since the 2 grand-kids and his daughter are visiting here, I thought I would make him a card.

I added this card to the weekly challenge on the RG AVE Community Facebook Group.  This week’s theme is to showcase “Stars.


for-edward


I used the digital version of a stamp set called “Crushed It!” from: https://rgstudio360.com/

When you purchase stamp sets from RGStudio360 they will mail it out to you, but you also get emailed the set in digital files, PNG, SVG, Jpeg. They also come outlined so you can use a cutting machine with them like a Scan N Cut. And also comes with out the line.

There is one star in the set, and since I used the digital version I put the star on a word doc and made them different sizes, and tried to do it randomly to make my own background paper. I added the twine behind the boy and sentiment because it reminds me of the comics when they draw lines for movement.

The boy was colored with Copic Sketch markers.

The front card panel, BOOM, Boy, and sentiment are popped up. I used a piece of holographic paper and in this picture it has picked up different colors. Window Word punch from SU for the sentiment.

Thanks for your visit here!

Have a lovley crafty week!

Happy 4th of July 2019!

Peace,

KristyLee

October 2018 Challenge card for ching chou kuik

Standard

Good morning crafty friends,

I have created a Halloween card using a digital stamp from “ching chou kuik.” The theme this month on their Challenge Blog is “Halloween.” I do hope you click on the challenge blog link and check out the Design Team’s projects. They are truly Beautiful and well done. Lots of inspiration if you need it.

Here is mine:

2018

I used Black card stock for the card base, then added a panel of Lime Green card stock. Added another panel of Gold Glitter card stock, heavy weight. My beautiful image drawn by Ching Chou Kuik, has been printed onto Xpress paper and colored with Copic Sketch markers.

Thank you for stopping by, I hope you liked my card. Happy Halloween!!

I would like to enter my card into the challenge:

https://cck-digitalstamps-challenge.blogspot.com/2018/10/ching-chou-kuik-digital-stamps.html

Stay crafty my friends,

KristyLee